LinkedIn polls are a dynamic tool that enables professionals, marketers, and business owners to foster meaningful conversations and gather actionable insights from their network. These polls are particularly effective for engaging audiences, as they prompt immediate participation and offer a structured format for feedback collection. Beyond interaction, LinkedIn polls serve as a gateway to understanding audience preferences, sparking ideas, and enhancing visibility on the platform.
Creating impactful polls is critical in today’s data-driven environment. Thoughtful questions paired with targeted outreach can provide a wealth of information—be it understanding customer pain points, testing product ideas, or gauging market sentiment. However, manually crafting and managing these polls can be time-consuming and resource-intensive. TexAu’s LinkedIn Poll Creator steps in as a game-changer, automating the process to save time while ensuring maximum efficiency. This tool empowers users to seamlessly create, post, and track polls, unlocking the full potential of LinkedIn as a platform for growth.
Key Features of TexAu’s LinkedIn Poll Creator
1. Automated Poll Creation
Gone are the days of manually crafting polls one by one. TexAu allows users to create LinkedIn polls with predefined questions and multiple-choice answers effortlessly. This feature ensures a smooth and consistent experience for both the poll creator and participants.
Example Scenario: Imagine you’re a digital marketing strategist looking to understand challenges faced by professionals in your field. Using TexAu, you can set up a poll asking, “What’s the biggest challenge in digital marketing?” with options like “SEO,” “Content,” “Budget,” and “Analytics.” This poll not only engages your audience but also positions you as an industry leader eager to address common pain points.
2. Customizable Poll Settings
TexAu empowers users to tailor poll settings according to their goals. Adjust the poll duration, visibility, and target audience with ease. Whether you want to address your immediate network or reach a broader demographic, the tool has you covered.
Example Scenario: A tech company conducting industry research can configure a poll to target connections in the tech sector and set it to run for 7 days. This precision ensures responses are relevant and actionable, avoiding clutter from unrelated inputs.
3. Bulk Poll Creation
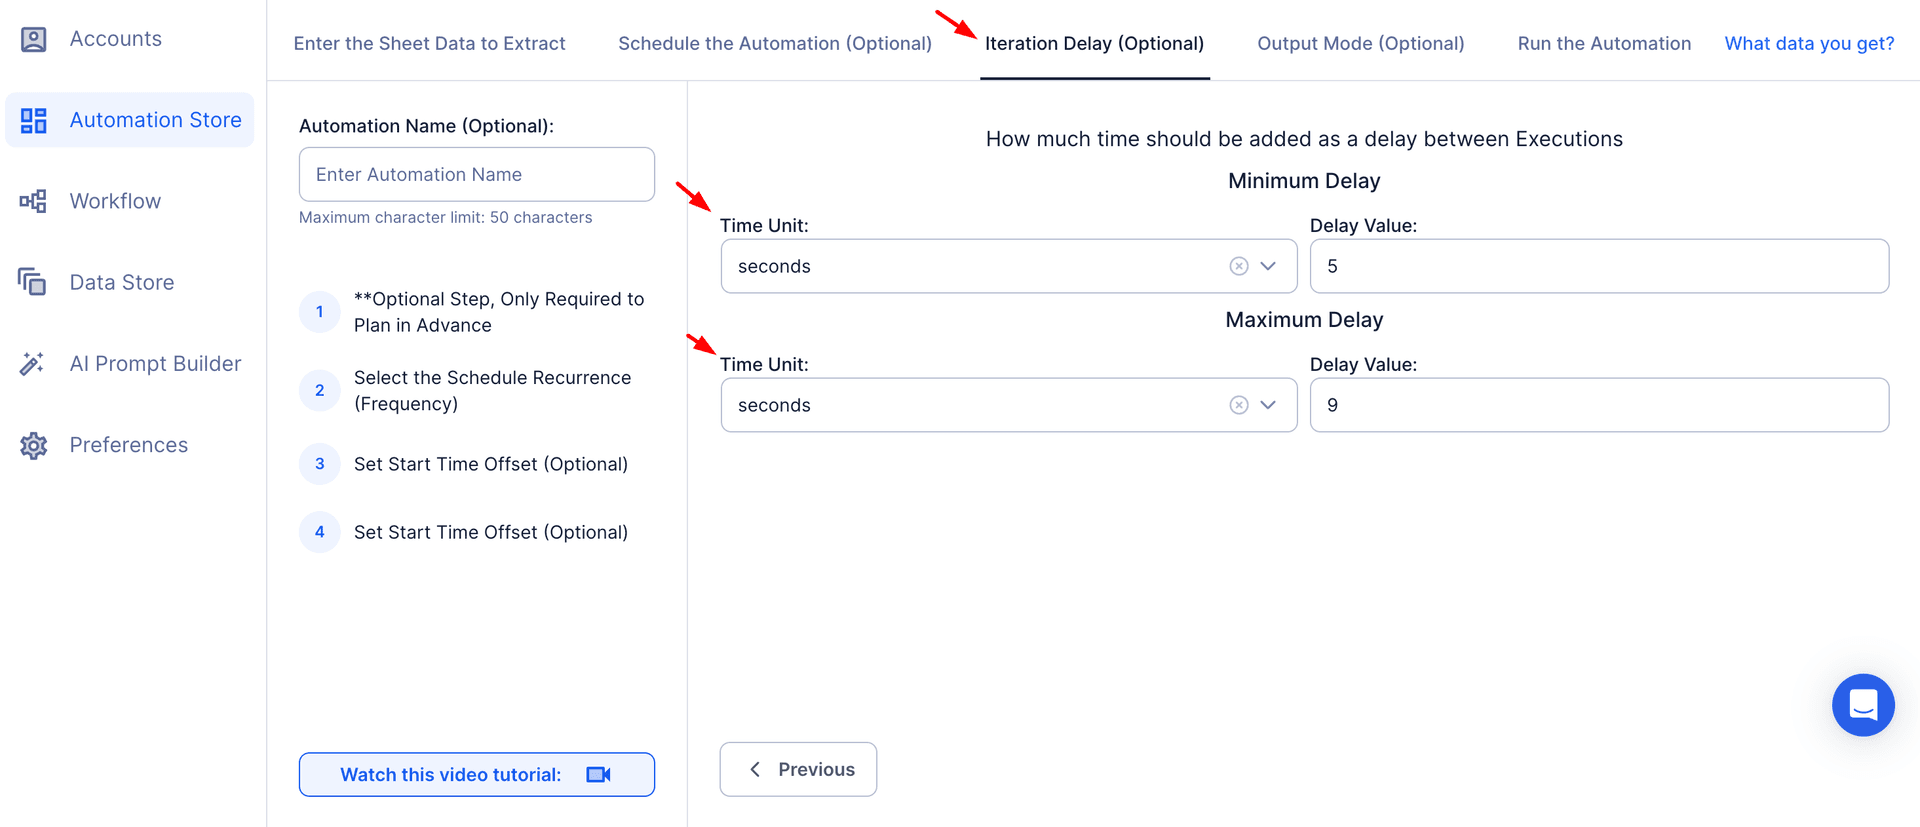
For users managing multiple campaigns or exploring varied audience segments, TexAu simplifies the process by enabling bulk poll creation. This feature is invaluable for testing multiple hypotheses or engaging different groups simultaneously.
Example Scenario: A leadership coach may run simultaneous polls on topics like “Effective Leadership Styles” and “Team Productivity Boosters” across various LinkedIn groups. The results can then be analyzed to understand trends across diverse professional communities.
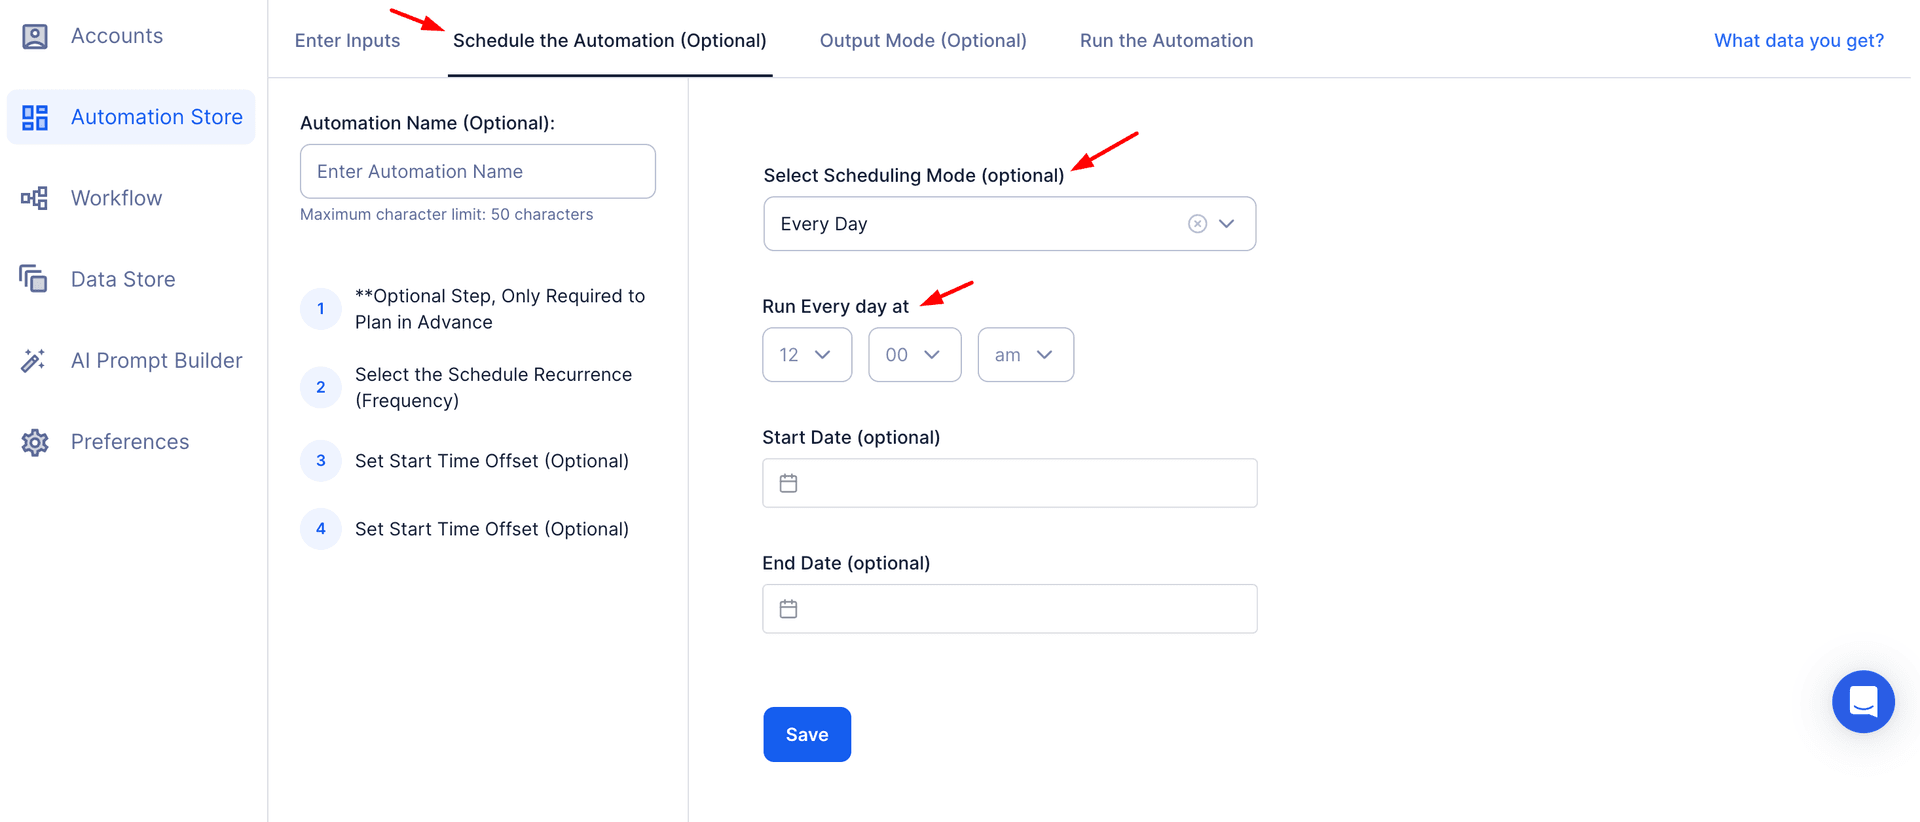
4. Scheduled Poll Posting
Timing plays a crucial role in maximizing engagement. TexAu’s scheduling capabilities allow users to post polls during peak LinkedIn activity hours, ensuring better visibility and participation.
Example Scenario: A marketing agency can schedule a poll on Monday morning asking, “What’s your priority for this week—Brand Awareness, Lead Generation, or Conversions?” Posting at the start of the workweek ensures responses align with professionals’ planning cycles.
Challenges Addressed by TexAu’s LinkedIn Poll Creator
1. Overcoming Low Engagement
Engagement is the cornerstone of a successful LinkedIn strategy. Without it, even the most well-thought-out posts can go unnoticed, limiting your visibility and networking potential. LinkedIn polls are an effective solution to this problem. They invite users to interact by providing their opinions in an easy and structured way, encouraging natural participation.
Polls are particularly useful because they simplify the interaction process—users only need to click an option to engage, as opposed to composing comments or messages. This simplicity drives higher participation rates while creating opportunities for meaningful discussions in the comments section.
Solution: TexAu’s LinkedIn Poll Creator streamlines the process of crafting engaging polls. By automating the poll creation workflow, it ensures that you can consistently publish content that resonates with your audience and drives interactions.
Example: A recruiter seeking insights into job seekers’ priorities could create a poll asking, “What’s more important for job satisfaction—salary, growth opportunities, or work-life balance?” This relatable question taps into the shared experiences of professionals, encouraging thoughtful responses and fostering discussions. The poll not only boosts engagement but also highlights the recruiter’s understanding of key workplace trends, positioning them as a reliable resource in their field.
2. Gathering Structured Feedback
Collecting feedback is critical for businesses and professionals, but doing so without a structured mechanism can feel overwhelming. LinkedIn polls provide an efficient way to organize and analyze input from a diverse audience. Unlike open-ended questions that may lead to scattered responses, polls offer predefined options, making it easier to draw actionable insights.
Whether you’re refining a product, planning an event, or gauging market sentiment, polls deliver data in a straightforward format. They’re particularly effective in uncovering patterns and preferences that might otherwise go unnoticed.
Solution: TexAu simplifies the feedback-gathering process by enabling users to design polls that address specific pain points or decision-making scenarios. This automation ensures that your polls are optimized to collect meaningful and relevant input.
Example: A product manager preparing for a feature launch could ask their network, “Which aspect of our product do you value most—Speed, Design, or Ease of Use?” By analyzing the poll results, they can prioritize the development of features that align with customer preferences. The structured feedback saves time, reduces guesswork, and ensures that decisions are backed by data.
3. Automating Manual Efforts
Manually creating, posting, and tracking LinkedIn polls can be time-consuming, especially if you’re managing multiple campaigns or audiences. Repeating this process week after week can lead to inefficiencies and burnout. Automation offers a practical solution to this challenge, freeing up your time to focus on analyzing results and crafting follow-up strategies.
Solution: TexAu automates every step of the poll creation process, from scheduling posts to monitoring engagement. This enables professionals to consistently deliver high-quality polls without investing excessive time and effort.
Example: A consultant specializing in market trends might want to post weekly polls to gauge industry shifts. With TexAu, they can schedule polls in advance, such as “What’s the most impactful digital trend for 2025?” TexAu automatically posts these polls, tracks their engagement, and generates insights, allowing the consultant to focus on creating value-added content based on the results.
Benefits of TexAu’s LinkedIn Poll Creator
1. Boosting Engagement
Polls are inherently interactive and draw users in by presenting quick, simple ways to participate. By posing thought-provoking questions or addressing trending topics, polls encourage users to engage with your content, sparking conversations and boosting your visibility on LinkedIn.
Example: A thought leader in artificial intelligence (AI) might ask their audience, “What’s the next big innovation in AI?” with options like “Generative AI,” “AI Ethics,” “Automation,” and “AI in Healthcare.” This poll not only generates responses but also starts conversations in the comments, further increasing the post’s reach. As more users engage, the thought leader’s profile gains more visibility, leading to additional followers and connection requests.
2. Gaining Audience Insights
Polls are a goldmine for gathering audience sentiment and preferences. By analyzing responses, you can uncover trends, identify pain points, and make data-driven decisions that resonate with your audience. This insight is invaluable for refining strategies, products, or services.
Example: A SaaS founder looking to enhance their platform could run a poll asking, “What’s your biggest priority in a business software—Ease of Integration, Customization Options, or 24/7 Support?” The poll responses provide direct feedback on what users value most, guiding the founder to focus development efforts on areas that will have the greatest impact.
3. Content Ideation
Polls not only provide insights but also inspire ideas for new content. By analyzing responses, you can identify trending topics, challenges, or preferences that can be transformed into blogs, articles, videos, or webinars.
Example: A career coach runs a poll on “What’s the biggest challenge in remote work?” The results—highlighting communication barriers as the top challenge—inspire the coach to write a blog titled “5 Strategies to Overcome Remote Work Communication Gaps.” This content not only addresses audience pain points but also positions the coach as a valuable resource in their industry.
4. Driving Lead Generation
Polls are a subtle yet effective tool for lead generation. By engaging participants in industry-relevant discussions, you can identify potential clients or collaborators who are genuinely interested in your field.
Example: A sales manager creates a poll asking, “What’s your biggest challenge in sales—Lead Generation, Closing Deals, or Client Retention?” Participants who vote for Lead Generation can be followed up with a personalized message offering resources, such as a free e-book or a consultation, tailored to address their challenges. This targeted approach converts poll engagement into actionable leads.
5. Establishing Brand Authority
Consistently creating polls on niche topics relevant to your industry positions you as a thought leader. When users associate your profile with insightful questions and discussions, it enhances your credibility and authority in your field.
Example: A cybersecurity expert regularly runs polls on topics like “The biggest threats to data security in 2025” or “Preferred tools for ransomware prevention.” Over time, this consistency builds their reputation as a go-to expert, attracting followers, collaborators, and potential clients who value their expertise.
By leveraging TexAu’s LinkedIn Poll Creator, professionals can streamline their efforts while reaping the benefits of enhanced engagement, actionable insights, and increased authority. Polls not only serve as a tool for interaction but also as a strategic asset for growth, decision-making, and brand-building.
Use Cases for TexAu’s LinkedIn Poll Creator
1. Marketers: Optimizing Campaign Strategies with Poll Feedback
Marketers thrive on understanding their audience’s preferences and behaviors. LinkedIn polls offer a direct and efficient way to gather insights that shape campaign strategies and resource allocation. By creating polls tailored to specific marketing challenges, professionals can refine their approach based on real-time feedback.
Scenario: A digital marketer working for an e-commerce brand wants to identify the most effective social media platform for driving sales. They create a LinkedIn poll asking, “Which social media platform offers the best ROI for your business?” with options like “Facebook,” “Instagram,” “LinkedIn,” and “TikTok.”
- Outcome: The results show a higher preference for LinkedIn and Instagram, prompting the marketer to allocate more resources to these platforms. This targeted focus increases campaign efficiency and ROI.
- Follow-Up: The marketer shares a post analyzing the poll results and explaining how the company will tailor its marketing strategy, reinforcing transparency and engagement with the audience.
2. Recruiters: Streamlining Recruitment Processes
Recruiters often face the challenge of understanding candidate preferences. Polls provide an easy way to gather input on recruitment strategies, helping organizations improve their hiring processes.
Scenario: A recruiter wants to understand how candidates prefer to conduct interviews. They run a LinkedIn poll asking, “What interview format do you prefer?” with options like “In-person,” “Virtual (Video Call),” “Phone Call,” and “Asynchronous Video.”
- Outcome: The poll reveals a majority preference for virtual interviews, encouraging the recruiter to focus on improving their video interview platform.
- Follow-Up: The recruiter sends a message to participants thanking them for their input and uses the data to create an infographic about modern hiring preferences, boosting their employer brand.
3. Business Owners: Prioritizing Customer Needs
For business owners, making informed decisions about product development or service enhancements is crucial. Polls enable them to directly involve their customers in the decision-making process.
Scenario: A SaaS founder plans to launch a new feature but wants to prioritize development based on customer preferences. They create a poll asking, “What feature would you like us to prioritize?” with options such as “Real-time notifications,” “Customizable dashboards,” and “Advanced reporting tools.”
- Outcome: Most customers vote for customizable dashboards, guiding the founder to focus development efforts on that feature.
- Follow-Up: The founder announces the feature rollout with a post thanking customers for their participation, increasing goodwill and customer loyalty.
4. Community Managers: Driving Engagement in Groups
Community managers rely on active engagement to keep their groups vibrant and valuable. Polls serve as an excellent tool to involve members in shaping the group’s content and activities.
Scenario: A LinkedIn group admin manages a community of marketing professionals and wants to decide the topic for the next webinar. They post a poll asking, “Which topic would you like us to cover in our next webinar?” with options like “SEO Strategies,” “Content Marketing Trends,” “Social Media Analytics,” and “Lead Generation Techniques.”
- Outcome: The majority votes for content marketing trends, ensuring the next webinar aligns with member interests.
- Follow-Up: The admin uses the poll results in a follow-up post to promote the webinar, showing participants their input was valued, which further drives attendance and engagement.
Best Practices for Maximizing Poll Impact
1. Ask Relevant Questions
Focus on topics that resonate with your audience and address current industry trends or challenges. The more relatable your poll is, the more likely it is to receive participation and meaningful responses.
Example: A healthcare startup could ask, “What’s the biggest challenge in patient data management?” to gather insights that guide product enhancements.
2. Keep Options Clear
Ensure poll options are concise, mutually exclusive, and easy to understand. Avoid overlapping choices that could confuse participants and dilute the value of the results.
Example: Instead of asking, “What’s your favorite way to market online?” with vague options like “Digital Marketing” and “Social Media,” provide more specific choices like “Content Marketing,” “Social Ads,” and “SEO.”
3. Engage After Polls
Your engagement shouldn’t stop when the poll ends. Share results, start discussions, and thank participants for their input. This follow-up not only boosts visibility but also fosters a sense of community.
Example: A tech entrepreneur could share the poll results with comments like, “Thank you for participating in our poll! 62% of you prefer automation tools for productivity. We’ll be launching a webinar on this topic next week—stay tuned!”
Metrics and Tracking
1. Vote Counts: Gauging Poll Effectiveness
The total number of votes is a key indicator of engagement. Polls with higher vote counts suggest strong audience interest and effective topic selection.
Example: A career coach notices that a poll on “Preferred LinkedIn Profile Optimization Tips” received 500+ votes compared to 200 votes on another poll about “Resume Formats.” This insight helps them focus on LinkedIn optimization for future content.
2. Demographic Insights: Understanding Your Audience
LinkedIn analytics allows you to break down poll responses by demographics such as job roles, industries, and locations. This data provides deeper insights into who is engaging with your polls.
Example: A recruiter observes that responses to a poll about workplace flexibility are primarily from mid-level professionals in the IT sector. They tailor their recruitment strategies to address this demographic’s preferences.
3. Engagement Growth: Tracking Overall Impact
Monitor how polls contribute to your LinkedIn visibility. Metrics like profile views, connection requests, and new followers often spike after well-received polls.
Example: A marketer running a poll about “The Future of AI in Marketing” sees a 30% increase in profile visits and new connections over the week following the poll.
Tips for Maximizing Results
1. Focus on Hot Topics
Leverage trending or debated issues in your industry to spark interest and participation. Hot topics naturally attract more engagement and discussions.
Example: A sustainability consultant could ask, “Which eco-friendly innovation will have the biggest impact in 2025?” during a time when environmental awareness is trending globally.
2. Engage Post-Poll
Share results along with meaningful insights. Thank participants for their input, and use the opportunity to invite further interaction, such as comments or follow-up polls.
Example: A financial advisor creates a post like, “87% of our poll participants believe automation will dominate personal finance in 2030. What do you think? Let’s discuss below!”
3. Experiment with Formats
Try different question styles, including yes/no, multiple-choice, or open-ended polls. This variety keeps your audience engaged and helps identify which formats work best for your goals.
Example: A team leader alternates between a “yes/no” poll asking, “Do you think remote work improves productivity?” and a multiple-choice poll exploring “What’s your biggest challenge with remote work?” to cover different aspects of the topic.
By following these detailed strategies and leveraging TexAu’s LinkedIn Poll Creator, you can unlock deeper engagement, gain actionable insights, and position yourself as a thought leader in your industry.
Conclusion: Elevate Your LinkedIn Strategy with TexAu
TexAu’s LinkedIn Poll Creator offers a powerful solution for professionals seeking to boost engagement, gather insights, and position themselves as industry leaders. By automating and optimizing poll creation and management, this tool ensures maximum efficiency and impact. Embrace TexAu today to transform your LinkedIn presence and unlock new growth opportunities.


