AI Translator
Break language barriers with a free AI translator that delivers fast and accurate results. Translate text, files, or content into 100+ languages without hassle. Whether you're reading, writing, or exploring global ideas, this tool makes multilingual communication effortless and precise. Start translating instantly with one simple click, no setup or sign-in required.
AI Translator
Tutorial
Overview
The AI Translator automation in TexAu enables you to translate content into multiple languages efficiently. This is particularly useful for founders, sales managers, marketers, and growth hackers who need to communicate with global audiences or localize content for better engagement. With features like data export to Google Sheets, automation scheduling, and desktop or cloud execution, this tool streamlines translation workflows.
Follow this step-by-step guide to configure and run the AI Translator automation, ensuring your translated content is organized and accessible.
Step 1: Log in to the TexAu and Connect Linkedin
Log in to your account at v2-prod.texau.com.

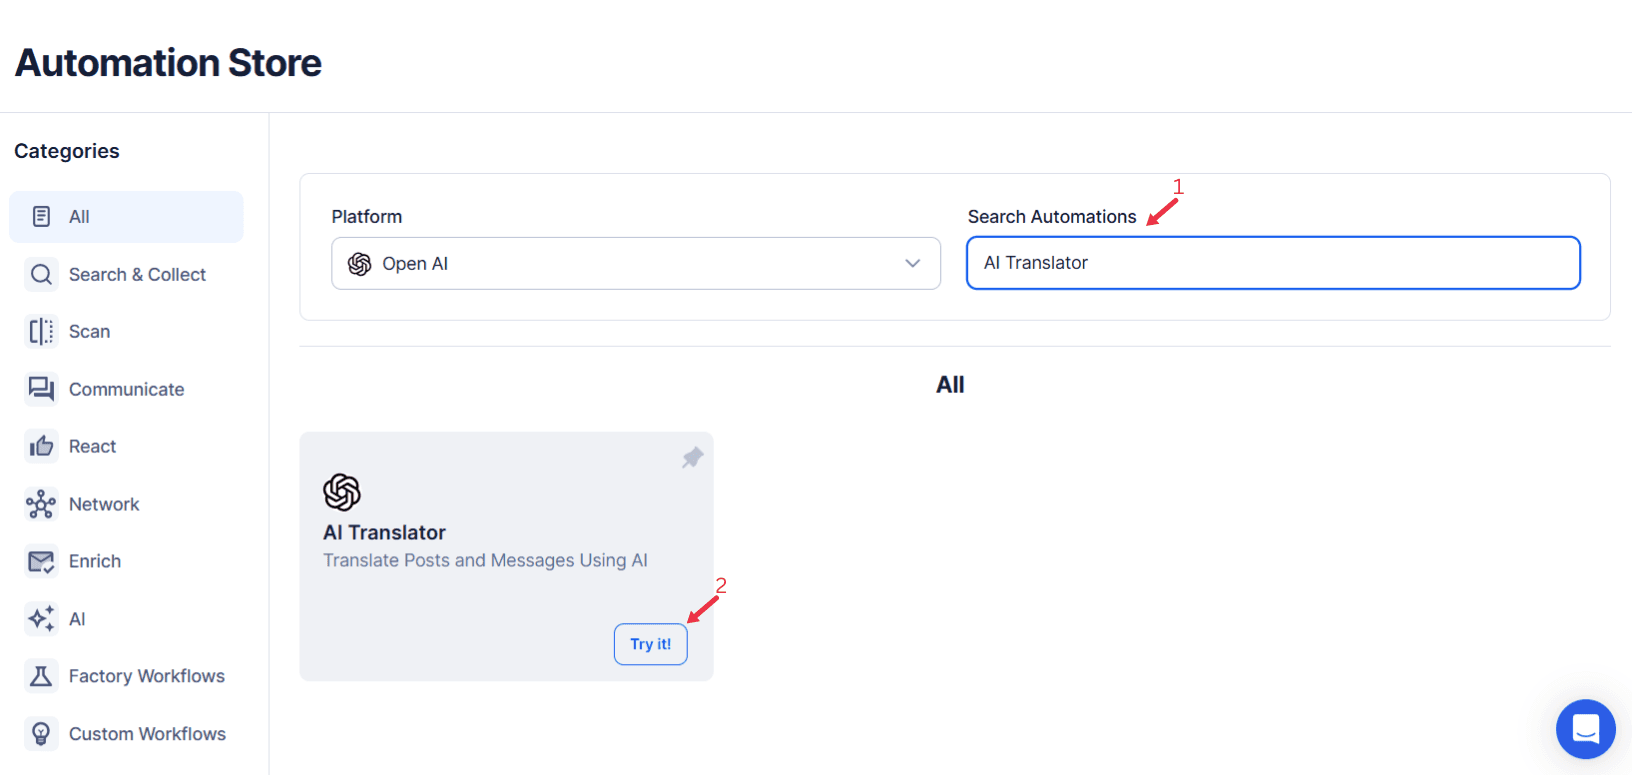
Step 2: Search for the Particular Automation
Log in to your TexAu account at v2-prod.texau.com. In the Automation Store, search for AI Translator and select it to open the configuration page.
Step 3: Select Your Input Source
AI Summarizer efficiently condenses lengthy text into key highlights, making it easier to grasp essential information quickly. It enhances productivity by automatically extracting the most relevant insights from any given content.
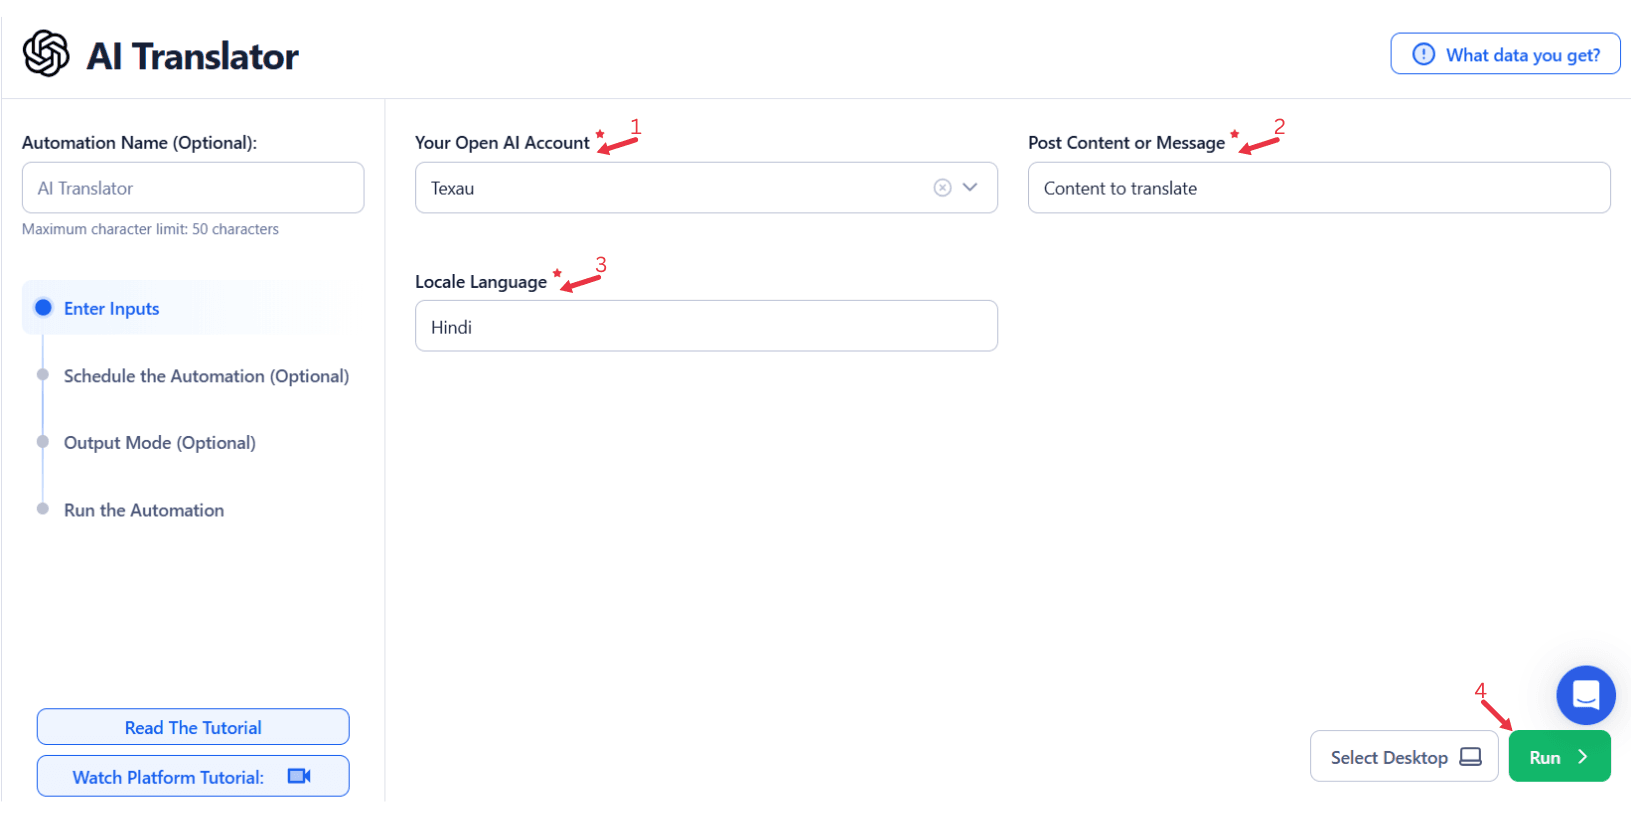
Single Input
This option allows you to summarize a single text input using AI within a specified OpenAI account.
Account: Select the OpenAI account that will be used for summarization.
Post Content: Enter the text content or message that needs to be summarized.
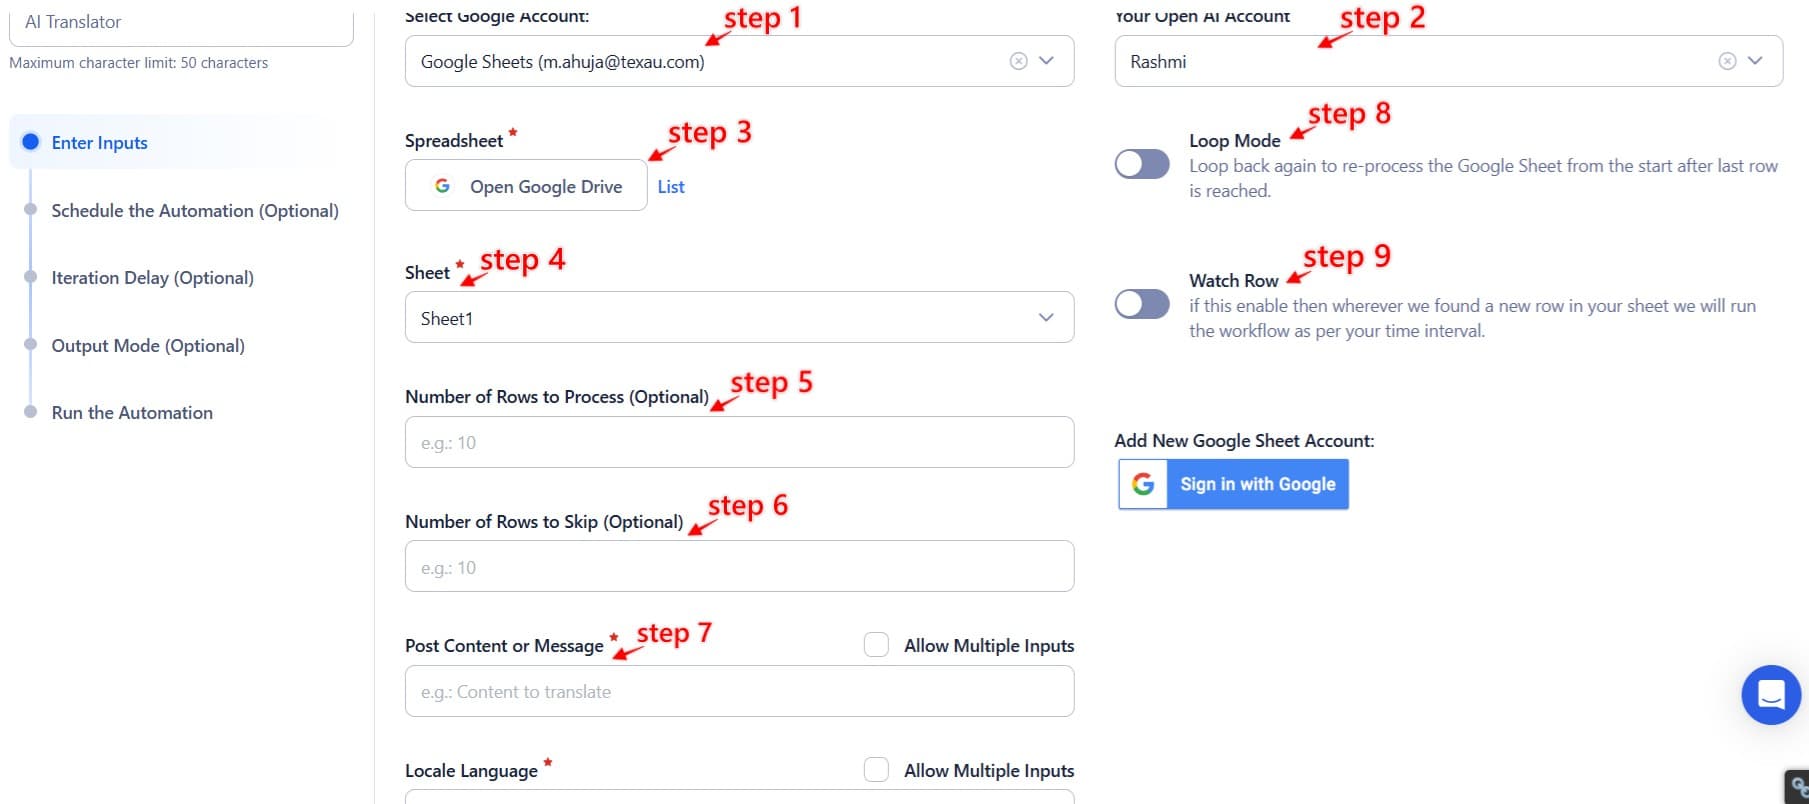
Google Sheets
Use this option to process multiple text inputs listed in a Google Sheet.
Select Google Account: Link your Google account or select an existing one. Add a new Google account if needed.
Select Your Spreadsheet: Click "Open Google Drive" to locate the Google Sheet. Choose the spreadsheet and sheet where text data is stored.
Processing Options:
- Number of Rows to Process (Optional): Specify how many rows to process from the sheet.
- Number of Rows to Skip (Optional): Define how many rows to skip before starting the process.
- Post Content: Allow multiple inputs for processing multiple text entries.
Loop Mode (Optional)
- Turn on Loop Mode to reprocess the Google Sheet from the start once all rows are completed.
Watch Row (Optional)
Watch Row feature helps automate workflows by detecting new Google Sheet entries and running workflows without manual action.
Define Watch Row settings by selecting an update frequency and an execution timeframe.
Watch Row Schedule
- None
- Scheduling Intervals (e.g., every 15 minutes, every hour)
- One-Time Execution
- Daily Execution
- Weekly Recurrence (e.g., every Tuesday and Thursday)
- Monthly Specific Dates (e.g., 7th and 22nd)
- Custom Fixed Dates (e.g., January 9)
By default, Watch Row scans every 15 minutes and runs for five days unless changed.
With Watch Row, workflows stay dynamic and data-driven.
Process a CSV File
For static lists of text content stored in a CSV file.
Upload the File: Click "Upload CSV File" and select the CSV containing the text data. Ensure the file includes all the required fields.
Adjust Processing Settings:
- Number of Rows to Process (Optional): Specify how many rows to process.
- Number of Rows to Skip (Optional): Define how many rows to skip before starting the process.
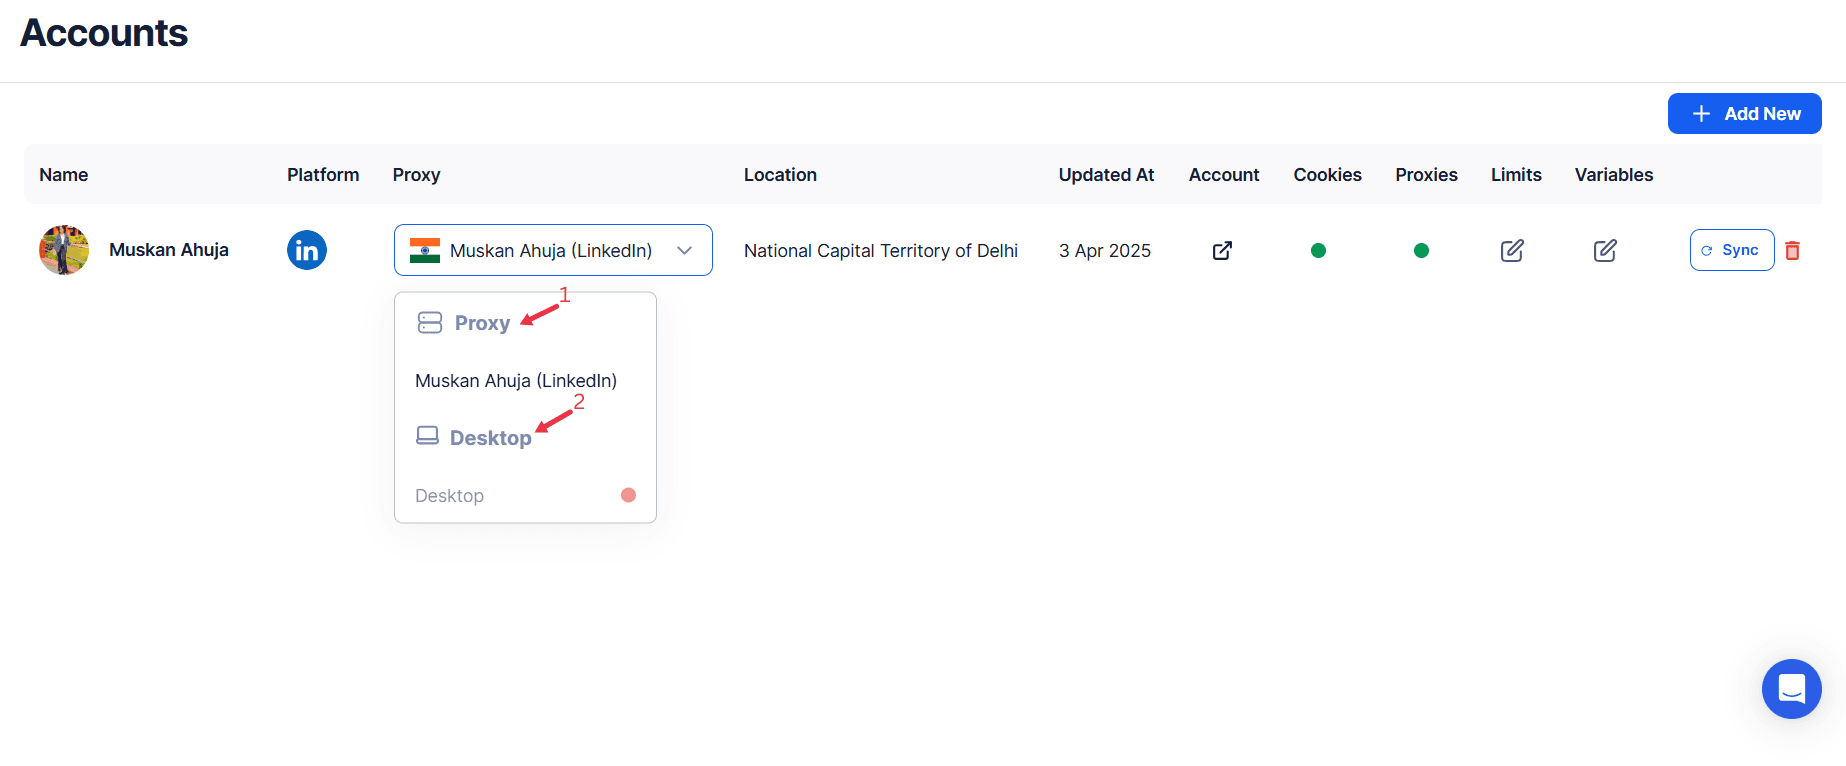
Step 4: Choose Cloud or Desktop Execution
Decide how you want to run the automation:
- Cloud Mode: Automates tasks on TexAu’s servers with built-in proxies. You can add custom proxies via Settings > Preferences > Proxies.
- Desktop Mode: Runs automation on your local device using your IP address.
Tip: Desktop mode saves cloud runtime credits and gives more control over the process.
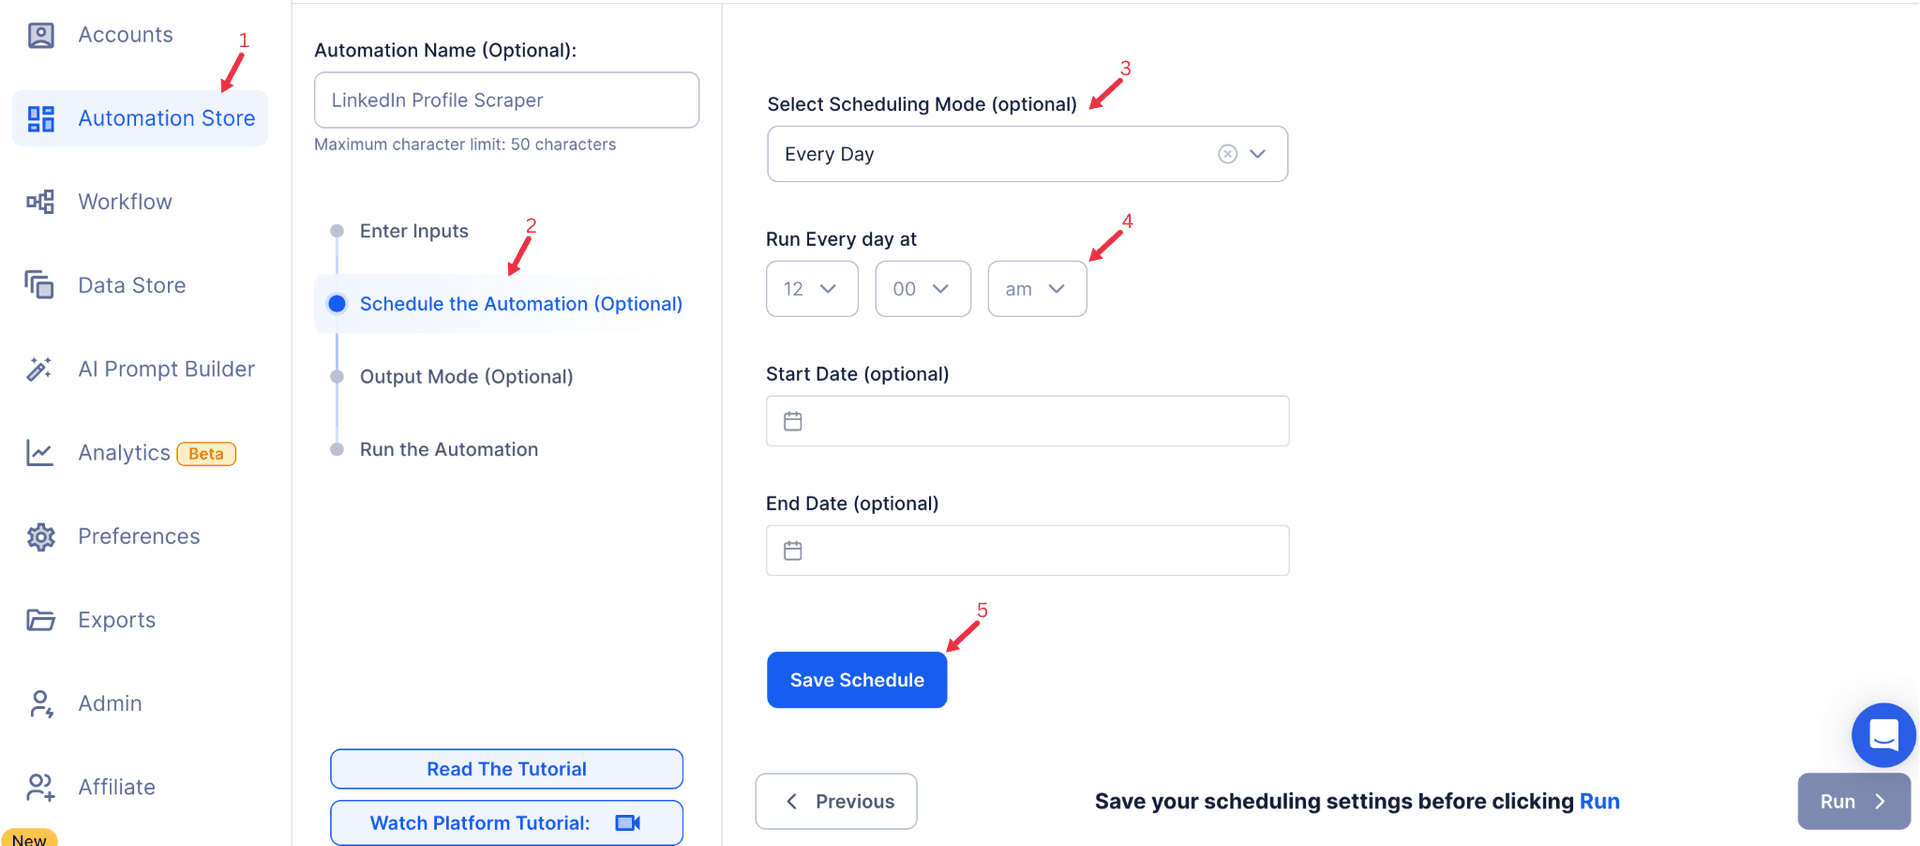
Step 5: Schedule the Automation (Optional)
Configure a schedule to run the summarization task at your preferred time or frequency. Click Schedule and choose one of the following options:
- None
- At Regular Intervals (e.g., every 12 hours)
- Once
- Every Day
- On Specific Days of the Week (e.g., Monday, Wednesday)
- On Specific Days of the Month (e.g., the 5th and 25th)
- On Specific Dates (e.g., January 15)
Tip: Use the scheduling feature for recurring tasks like summarizing weekly reports or monitoring updates on web pages.
Step 6: Set an Iteration Delay (Optional)
To simulate a natural pace and prevent API throttling, configure an Iteration Delay. Set Minimum Delay and Maximum Delay values to vary the time interval between each summarization task. You can choose seconds, minutes, or hours as the delay units.

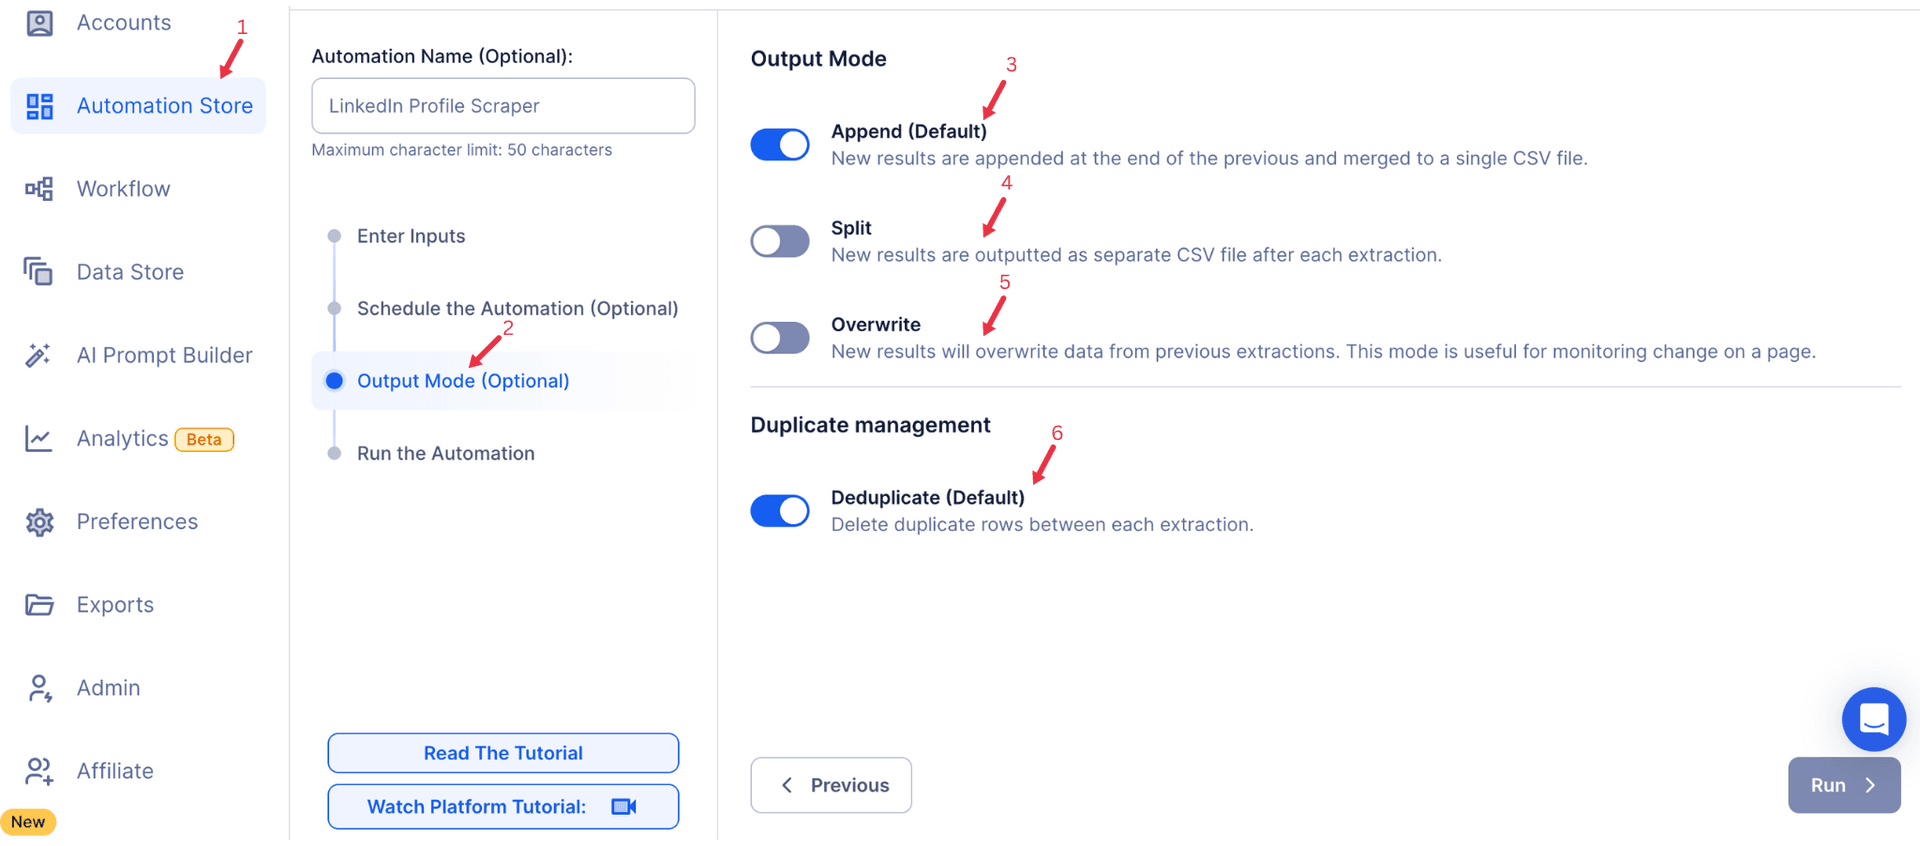
Step 7: Choose Your Output Mode (Optional)
Decide how you want to manage and export the summarized data:
- Export Options: Choose to export data directly to Google Sheets or a CSV file for convenient storage and analysis.
- Output Management:
- Append (Default): Add new summaries to the existing file.
- Split: Create a new file for each automation run.
- Overwrite: Replace previous summaries with the latest results.
- Duplicate Management: Enable Deduplicate to avoid processing duplicate entries from your input.
Tip: Exporting to Google Sheets ensures collaborative tracking and easy sharing of summarized content.
Step 8: Access the Data from the Data Store
Once the automation is complete, navigate to the Data Store section in TexAu. Locate the AI Translator automation and click See Data to view or download the summarized results.
Screenshot Suggestion: Show the Data Store screen with the "See Data" button highlighted.
The AI Translator automation makes translating large volumes of content efficient and scalable. With robust scheduling, output management, and multiple input options, this tool empowers teams to localize their communication effectively and stay connected with global audiences.
Recommended Automations
Explore these related automations to enhance your workflow
Twitter Tweet Scraper
Extract tweets by keyword, hashtag, or account using TexAu’s Twitter Tweet Scraper. Schedule runs, delay actions, and export data to CSV or Sheets. Ideal for trend tracking, brand monitoring, or campaign research, this tool helps marketers and growth teams gather Twitter insights efficiently.
Twitter Profile Tweets and Replies Export
Twitter Profile Tweets and Replies Export automation lets you extract tweets and replies from specific profiles with ease. Features like scheduling, iteration delays, and export to Google Sheets or CSV simplify data collection. Use it to analyze trends, track audience engagement, and gather competitive insights. A practical solution for making informed, data-driven decisions and optimizing your Twitter strategy efficiently.
Company Website Finder
Find official websites using company names or LinkedIn profiles. TexAu’s Company Website Finder automates the process, lets you schedule runs, and exports data to Sheets or CSV. It’s ideal for enriching CRM records, improving lead lists, and powering sales or recruiting workflows, all without manual research or copy-pasting.
See it work in 2 minutes. Paste your own data.
No credit card required. 14 days, full access, all features.